Landscaping tips and tricks on how to add a planting bed to your yard.
Once you have received your planting bed design, follow this “humorous
how-to guide” for tips on adding a planting bed to your yard.
If you haven't yet had me come over and design you the perfect low-maintenance yard full of color that blooms from Spring through Fall, click here!
You will need:
• Edging shovel (flat tip edging spade)
• Utility knife
• Plants
• Edging
• Soil
• Fabric (optional)
• Mulch
• Motivation
1. Grab a can of spray paint and draw out the shape of your planting bed to create the edge line.
2. Using an edging shovel, dig out the edge of your plant bed at a slight angle. (If you don’t have one, I would suggest buying one or borrowing one - they are most efficient for getting the edging done quickly and they dig a clean line)
3. Remove grass from entire planting bed area.
OR -
Remove ONLY about 18” of the grass from the edge and flip the sod, grass side down, into a section of the planting bed that will remain unused such as up against the foundation of your home. The sod will eventually decompose into your plant bed.
4. Install the plastic edging inside your edge line. (Be careful of the ends of the edging when mowing your lawn, I have chewed mine up.)
5. Dump soil inside the planting bed area. You will need a minimum of about 4” of good soil for planting.
6. A steel rake works great to move the soil around and create your mound. And by mound, we don’t mean Mt. Marcy, we are talking just enough of an increase in the ground level for excess rain to run off and not create puddles.
7. If you have chosen to use fabric, lay the fabric inside planting bed, from edge to edge.
8. Place all your plants (leave them in the buckets) in the correct location, based on the planting design. Then take a step back and review your plant garden from afar to make sure all plants are evenly placed and spread.
9. With a utility knife, carefully cut one hole at a time in the fabric to plant each item.
10. Add about a 3-4” cover of mulch.
11. Take a photo of your beautiful planting bed and send it to us!
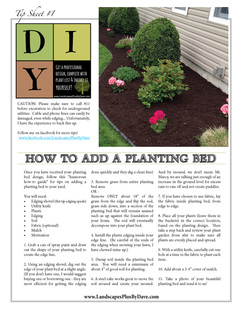
CAUTION: Please make sure to call 811
before excavation to check for underground
utilities. Cable and phone lines can easily be
damaged, even while edging... Unfortunately,
I have the experience to back this up.
Free download available below.
Follow me on facebook for more tips!
www.facebook.com/LandscapesPlusByDave
Once you have received your planting bed design, follow this “humorous
how-to guide” for tips on adding a planting bed to your yard.
If you haven't yet had me come over and design you the perfect low-maintenance yard full of color that blooms from Spring through Fall, click here!
You will need:
• Edging shovel (flat tip edging spade)
• Utility knife
• Plants
• Edging
• Soil
• Fabric (optional)
• Mulch
• Motivation
1. Grab a can of spray paint and draw out the shape of your planting bed to create the edge line.
2. Using an edging shovel, dig out the edge of your plant bed at a slight angle. (If you don’t have one, I would suggest buying one or borrowing one - they are most efficient for getting the edging done quickly and they dig a clean line)
3. Remove grass from entire planting bed area.
OR -
Remove ONLY about 18” of the grass from the edge and flip the sod, grass side down, into a section of the planting bed that will remain unused such as up against the foundation of your home. The sod will eventually decompose into your plant bed.
4. Install the plastic edging inside your edge line. (Be careful of the ends of the edging when mowing your lawn, I have chewed mine up.)
5. Dump soil inside the planting bed area. You will need a minimum of about 4” of good soil for planting.
6. A steel rake works great to move the soil around and create your mound. And by mound, we don’t mean Mt. Marcy, we are talking just enough of an increase in the ground level for excess rain to run off and not create puddles.
7. If you have chosen to use fabric, lay the fabric inside planting bed, from edge to edge.
8. Place all your plants (leave them in the buckets) in the correct location, based on the planting design. Then take a step back and review your plant garden from afar to make sure all plants are evenly placed and spread.
9. With a utility knife, carefully cut one hole at a time in the fabric to plant each item.
10. Add about a 3-4” cover of mulch.
11. Take a photo of your beautiful planting bed and send it to us!
CAUTION: Please make sure to call 811
before excavation to check for underground
utilities. Cable and phone lines can easily be
damaged, even while edging... Unfortunately,
I have the experience to back this up.
Free download available below.
Follow me on facebook for more tips!
www.facebook.com/LandscapesPlusByDave
| tip_sheet_1_planting_bed.pdf |
 RSS Feed
